

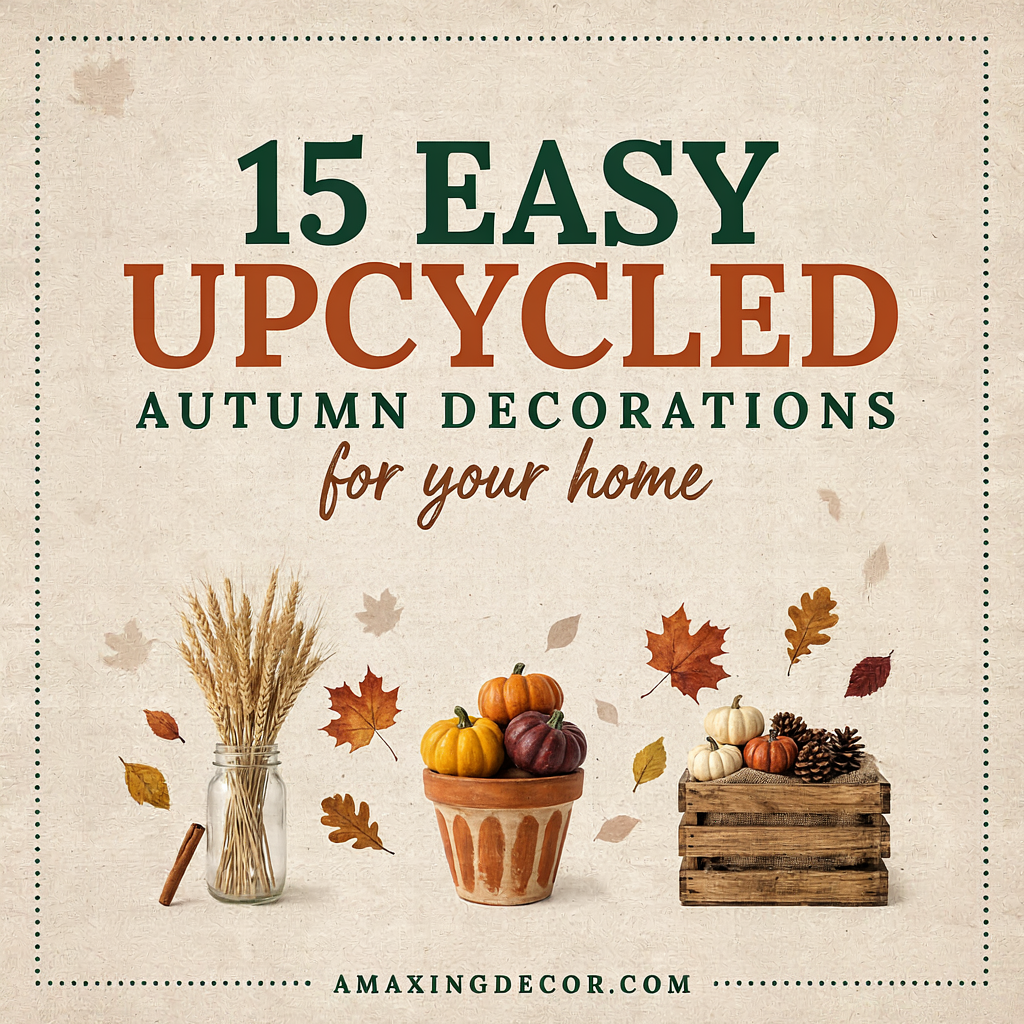
Autumn decorating does not have to begin with a shopping basket full of new ornaments. Glass jars, food tins, cardboard boxes, worn textiles and leftover paint can all become useful seasonal decorations with a little imagination.
Upcycling is most successful when the finished item looks intentional rather than simply homemade. A limited colour palette, careful preparation and neat finishing make a significant difference. Instead of covering every surface with crafts, create a few well-made pieces that complement the colours and materials already in your home.
The 15 projects below use accessible materials and straightforward methods. Most can be adapted to suit rustic, modern or neutral interiors. Read the complete instructions before starting, supervise children appropriately and choose paints, adhesives and tools that are suitable for the materials involved.
The Complete Autumn Home Décor Guide: Colours, Textures and Room Ideas
Upcycled Autumn Decorations
Before you begin: collect and prepare your materials
Upcycling is not about saving every empty container. Keep only materials that are clean, structurally sound and genuinely useful for a planned project.
Potential materials include:
- Clean glass jars and bottles
- Food tins with no sharp edges
- Strong cardboard packaging
- Old cotton shirts, pillowcases or table linen
- Wool jumpers that are no longer wearable
- Wooden picture frames or small trays
- Leftover wallpaper or wrapping paper
- Ribbon, twine and fabric offcuts
- Sound wood offcuts or unused wooden beads
- Paper shopping bags and kraft paper
Wash food containers thoroughly and remove loose labels and adhesive. Check glass for chips and cracks. Sand rough wood where appropriate, and deal with sharp metal edges before decorating a tin.
Create a simple palette before starting. Rust, olive, cream, mustard, burgundy, brown and warm grey combine naturally with autumn décor. Repeating three or four shades across several projects will make separate upcycled pieces look like one collection.
Essential safety notes
DIY projects vary in risk. Adapt each idea to your ability and the equipment available.
- Wear suitable eye and hand protection when cutting, drilling or sanding.
- Use tools only as instructed and on a stable work surface.
- Keep hot-glue tools, craft knives, drills and sharp scissors away from children.
- Work in a ventilated area when using paint, varnish or adhesive.
- Follow all product drying, curing and fire-safety instructions.
- Smooth or cover sharp tin and wire edges completely.
- Never place an open flame inside an improvised container.
- Keep paper, dried foliage, fabric and wood away from heaters and fire.
- Check wall fixings before hanging heavy frames, wood or glass.
- Do not use unknown or treated wood for projects involving food or heat.
Flameless battery candles are the safest choice for the lantern-style projects in this article.
1. Turn glass jars into autumn lanterns
Clean jars make simple lanterns for a mantel, windowsill or dining table. Their transparent surface works with paint, paper, twine and pressed-leaf effects.
You will need
- Clean glass jars without chips or cracks
- Tissue paper, translucent paper or suitable decorative leaves
- Decoupage medium or an adhesive intended for glass and paper
- Soft brush
- Twine or ribbon
- Battery-operated tealights
How to make them
- Wash and dry the jars thoroughly.
- Tear the paper into irregular pieces or arrange the leaf shapes before applying adhesive.
- Brush a thin layer of decoupage medium onto a small section of glass.
- Smooth the paper or decoration into place, then seal it according to the product instructions.
- Allow the jar to dry and cure fully.
- Add twine around the neck if desired.
- Place a battery-operated tealight inside.
Amber, rust and cream tissue create a gentle glow. For a more modern result, decorate only the lower third of each jar and leave the remaining glass clear.
Never use a real candle unless the original container and every decorative material have been specifically assessed as safe for that use. Paper, glue and twine are combustible.
2. Make painted tin-can planters
Food tins can become small covers for nursery pots or containers for artificial stems. A group in graduated heights works well on a kitchen windowsill or covered entrance.
You will need
- Clean tins
- Metal file or edge-protection product
- Suitable metal primer and paint
- Brush or sponge
- Small potted plants in inner containers
- Tray or saucer to catch water
How to make them
- Remove the label and wash the tin.
- Check the top carefully and file or cover every sharp edge.
- Apply primer and paint according to the manufacturer’s instructions.
- Allow the finish to cure fully.
- Place a plant in a separate inner pot and use the tin as a decorative outer cover.
- Remove the inner pot for watering and let it drain before replacing it.
Painting several tins in olive, rust and warm cream creates a coordinated set. Add simple bands, numbers or leaf silhouettes rather than numerous small motifs.
Do not plant directly into an unmodified tin unless you have safely created appropriate drainage and protected the metal. Standing water may damage both the plant and the container.
3. Sew cushion covers from an old shirt
A checked, corduroy or plain cotton shirt can become a seasonal cushion cover. This project works particularly well with fabric that is still attractive but no longer suitable to wear.
You will need
- Clean woven shirt in usable condition
- Cushion pad
- Fabric scissors
- Pins or clips
- Sewing machine or hand-sewing equipment
- Thread
How to make it
- Wash and press the shirt.
- Position the buttoned section as the centre or back opening of the cushion.
- Measure the cushion pad and mark two fabric squares with seam allowance.
- Cut the pieces, pin them with the right sides facing and sew around the edges.
- Trim bulky corners, turn the cover through the button opening and press it.
- Insert the cushion pad and close the buttons.
Use a shirt in rust, olive, burgundy or a subtle autumn check. Retaining the original buttons makes the upcycling visible without making the cover look unfinished.
Choose a sound fabric without thinning patches. Keep buttons secure, especially in homes with very young children.
4. Create pumpkins from an old jumper
A felted or tightly knitted jumper can be turned into soft decorative pumpkins. These add texture to a shelf or sideboard and can be stored for future years.
You will need
- Clean old jumper
- Fabric scissors
- Strong thread and needle
- Suitable filling from an old cushion or craft stuffing
- Twine
- Small clean twig or fabric stem
How to make them
- Cut a rectangular section from the jumper body or sleeve.
- Sew the short ends together to form a tube.
- Gather one open edge tightly and stitch it closed.
- Turn the fabric so the seam sits inside.
- Add filling gradually, keeping the shape soft rather than overstuffed.
- Gather and close the top around the stem.
- Wrap strong thread or twine around the pumpkin in several sections to create gentle ribs.
Make three sizes from different parts of the jumper and display them as a group. Cream, oatmeal, burnt orange and moss green work particularly well.
These pumpkins are decorative, not toys. Secure all components and keep small stems, buttons or beads away from young children and pets.
5. Build a cardboard leaf garland
Strong cardboard packaging can become an autumn garland for a shelf, mantel or blank wall. The project is lightweight and easy to adapt to the width of the space.
You will need
- Flat cardboard packaging
- Leaf templates
- Pencil
- Craft knife or strong scissors
- Cutting mat
- Leftover paint or paper
- Hole punch
- Twine or ribbon
How to make it
- Draw several simple leaf shapes on the cardboard.
- Cut them carefully using a protected work surface.
- Paint the leaves or cover them with leftover paper.
- Allow them to dry completely.
- Punch one or two holes in each leaf.
- Thread them onto twine, leaving small gaps between the shapes.
- Hang the garland from secure removable hooks suited to the wall.
Use three repeated colours instead of painting every leaf differently. A mixture of rust, olive and cream will look cohesive and can complement other autumn decorations.
Keep the garland away from candles, fireplaces, heaters and hot light fittings.
6. Upcycle a picture frame into seasonal artwork
An unused picture frame can become autumn wall art without making permanent changes to the room. The insert can be replaced when the season ends.
You will need
- Sound picture frame
- Leftover wallpaper, fabric or decorative paper
- Card for backing
- Scissors or craft knife
- Archival tape or suitable adhesive
- Optional pressed leaves that are fully dry and legally collected
How to make it
- Clean the frame and inspect its fixings.
- Cut the backing card to fit.
- Add fabric, wallpaper or paper as the background.
- Arrange a simple leaf silhouette, botanical shape or autumn quotation.
- Secure the artwork flat and reassemble the frame.
- Hang it using a fixing appropriate for the wall and frame weight.
For a modern result, place one dark leaf silhouette against cream paper. For a richer traditional look, use burgundy fabric with a small antique-style botanical print.
Do not seal damp plant material inside a frame. Moisture can stain the paper and encourage mould.
7. Make fabric-leaf bunting from offcuts
Small fabric remnants can become reusable bunting for a dresser, shelf or covered seasonal display. Use stable woven fabrics that will not stretch excessively.
You will need
- Fabric offcuts
- Card leaf template
- Fabric pencil
- Scissors
- Fusible interfacing, if required
- Sewing machine or needle and thread
- Cotton tape or ribbon
How to make it
- Press the fabric and strengthen thin pieces with interfacing if necessary.
- Trace and cut pairs of leaf shapes.
- Sew each pair together, leaving a small seam or using a neat raw-edge finish suited to the fabric.
- Arrange the leaves along cotton tape.
- Stitch them securely in place.
- Hang the bunting away from heat sources.
Mix plain fabrics with only one small pattern. Old shirts, table linen and cushion-cover remnants can work well when their condition is sound.
8. Transform glass bottles into branch vases
Clear or coloured bottles can become slim vases for a console, dining table or windowsill. A group of three different heights creates more impact than one bottle alone.
You will need
- Clean glass bottles
- Label-removing solution appropriate for glass
- Suitable glass paint, optional
- Natural or artificial branches
- Felt pads for the base
How to make them
- Soak and remove the labels.
- Clean away adhesive and dry the bottles fully.
- Leave the glass clear or apply paint intended for glass.
- Add felt pads beneath the base if the surface needs protection.
- Place one or two lightweight branches in each bottle.
Amber and green bottles already suit an autumn palette. Clear bottles can be painted in warm cream, brown or smoky grey, though a simple transparent group may look more refined.
Check for chips before use and position tall arrangements where they cannot be knocked over. Keep dried branches away from naked flames and heat.
9. Create candle-style holders from old jars—without flames
Small jars can be wrapped in fabric, paper or punched card to create patterned holders for battery lights. These are useful for evening table styling and dark hallway corners.
You will need
- Small clean jars
- Paper bags, lace remnants or thin fabric
- Double-sided tape or suitable adhesive
- Ribbon or twine
- Battery-operated tealights
How to make them
- Measure the height and circumference of each jar.
- Cut a paper or fabric sleeve that fits without overlapping excessively.
- Add punched leaf shapes or a simple cut-out pattern if desired.
- Secure the sleeve neatly.
- Finish with a narrow ribbon.
- Place a battery light inside.
Use one material across a group and vary only the height of the jars. This produces a cleaner result than applying different decorations to every container.
These holders are intended for flameless lights only. Decorative sleeves and adhesives may be combustible.
10. Turn a wooden offcut into a simple autumn sign
A sound piece of leftover timber can become a small sign for a shelf or covered entrance. Keep the design simple so the grain remains visible.
You will need
- Clean, untreated wood offcut in sound condition
- Sandpaper
- Suitable paint or wood stain
- Pencil and ruler
- Stencil or lettering guide
- Brush
- Protective finish suitable for the intended location
How to make it
- Confirm that the timber is clean and free from unknown coatings, rot, nails and splinters.
- Sand the surfaces and round sharp corners where appropriate.
- Wipe away dust.
- Stain or paint the background and allow it to dry.
- Add a short word or restrained leaf motif.
- Apply a suitable protective finish if required.
Words such as “Autumn”, “Gather” or “Welcome” are enough. Avoid filling a small board with a long quotation that is difficult to read.
Do not cut or sand treated, painted or unidentified reclaimed timber without understanding the material and using the required controls. Some old coatings and preservatives can be hazardous.
11. Make a paper-bag autumn wreath
Strong kraft paper shopping bags can be transformed into leaves for a lightweight indoor wreath. Variations in the brown paper create natural-looking depth.
You will need
- Clean kraft paper bags
- Cardboard ring cut from packaging
- Leaf template
- Scissors
- Suitable craft adhesive
- Paint or ink, optional
- Ribbon for hanging
How to make it
- Cut a sturdy ring from corrugated cardboard.
- Cut numerous leaves from the paper bags.
- Fold or lightly crease each leaf down the centre.
- Add muted paint to a few leaves if desired.
- Starting at the outer edge, overlap and glue the leaves around the ring.
- Allow the wreath to dry flat.
- Attach a ribbon and hang it indoors from a secure hook.
Keep part of the cardboard base visible only if it has been covered or painted neatly. A concentrated ribbon at the bottom can provide a stronger finish than a large bow at the top.
Paper wreaths are for dry indoor use. Keep them away from flames, heaters, kitchens and damp entrance doors.
12. Cover old books or boxes with autumn paper
Damaged decorative boxes or empty sturdy packaging can become risers for a seasonal display. Removable covers can also give ordinary books an autumn look without altering them permanently.
You will need
- Strong empty boxes or books you own
- Kraft paper, leftover wallpaper or wrapping paper
- Ruler and pencil
- Scissors
- Double-sided tape or removable fastening method
- Labels, optional
How to make them
- Measure the item and cut the paper with enough allowance for neat folds.
- Wrap boxes as though covering a parcel, keeping seams at the back or underneath.
- For books, create removable dust-jacket-style covers without gluing anything to the original cover.
- Add a small handwritten or printed spine label if desired.
- Stack two or three items and place one lightweight decoration on top.
Use them beneath a small pumpkin, vase or frame to add height to a console arrangement. Avoid unstable stacks and never disguise books that need to be identified quickly.
13. Weave a table runner from fabric strips
Long fabric remnants can be woven into a narrow decorative runner. This is a good use for cotton, linen-look or tightly woven fabric left from other projects.
You will need
- Fabric strips of similar width
- Fabric scissors or rotary cutter
- Non-slip cutting mat
- Pins
- Sewing machine or needle and thread
- Iron
How to make it
- Wash and press the fabric.
- Cut strips to a consistent width.
- Lay the long strips parallel and weave shorter strips over and under them.
- Pin the outer edges carefully.
- Stitch around the perimeter and reinforce loose intersections where necessary.
- Trim and finish the edges neatly.
Keep the runner relatively narrow so the table remains practical. Rust, beige and olive fabrics can produce a subtle plaid effect.
Do not place loose fabric near candles or hot serving dishes. For a dining table, ensure the finished piece can be washed and lies flat.
14. Make autumn napkin rings from curtain rings
Unused wooden curtain rings can become simple reusable napkin rings. Their round form needs little alteration.
You will need
- Clean wooden curtain rings
- Fine sandpaper
- Leftover paint or stain
- Narrow ribbon, twine or fabric strips
- Small artificial leaf, optional
- Suitable adhesive, if required
How to make them
- Remove hooks or metal fittings carefully if present.
- Sand rough areas.
- Paint or stain the rings and allow them to dry fully.
- Wrap one small section with ribbon or twine.
- Add a single small leaf if desired.
- Check that every element is firmly secured before use.
Make the set consistent rather than decorating each ring differently. Natural wood with burgundy ribbon or matt black with cream linen creates an elegant autumn table.
Keep detachable small parts away from young children, and do not allow decorative materials to touch food.
15. Create a seasonal tray from an old frame
A sturdy picture frame can be transformed into a decorative tray for a coffee table or sideboard. Use it to group a vase, battery lantern and small pumpkin.
You will need
- Strong wooden frame with secure corners
- Backing board cut to fit
- Leftover wallpaper, fabric or paint
- Suitable adhesive
- Optional handles designed for the purpose
- Drill and fixings, if adding handles
- Felt pads
How to make it
- Remove the glass; it is not necessary for this project and may be unsafe for carrying objects.
- Inspect and reinforce the frame if required.
- Cut a solid backing board to fit securely.
- Cover or paint the board and allow it to cure.
- Fix the board to the frame using a method appropriate for the materials.
- Add handles only if you have the tools and knowledge to attach them safely.
- Apply felt pads beneath the corners.
Treat the finished item as a decorative organiser unless it has been constructed and tested to carry weight. Do not use it for hot cookware, food service or heavy drinks.
How to style upcycled autumn decorations
Upcycled pieces look strongest when combined with ordinary home décor rather than displayed as a separate craft collection.
Use these principles:
- Group objects in odd numbers, usually three or five.
- Mix heights with a vase, frame and low pumpkin.
- Repeat the same two or three colours.
- Combine one handmade object with books, ceramics or a lamp.
- Leave empty space around the display.
- Avoid putting a craft on every shelf and table.
- Use a tray to connect several small objects.
For example, place three bottle vases beside one framed leaf print, or group two jumper pumpkins with a lamp and existing stack of books. The handmade element becomes part of the room rather than the whole story.
Upcycled autumn décor by room
Living room
Use fabric pumpkins, a framed botanical print and a jar lantern with a battery light. Keep the fireplace and heaters clear of fabric, paper and dried material.
Dining room
Add a woven runner, upcycled napkin rings and a low arrangement of bottle vases. Preserve room for plates and serving dishes.
Kitchen
Use painted tin-pot covers on a windowsill or a small wooden sign on an open shelf. Keep worktops, the hob and food-preparation areas clear.
Bedroom
Introduce one shirt-fabric cushion and a framed paper artwork. Avoid filling the bed with seasonal objects that must be moved every night.
Hallway
Style one tray with a branch vase, fabric pumpkin and flameless jar light. Do not narrow the route or hide keys and switches.
Covered entrance
Use only projects made from materials suited to the conditions. Paper, ordinary fabric, indoor paint and untreated cardboard should remain inside.
A simple weekend upcycling plan
If you want several coordinated decorations, organise the work in batches.
Friday evening: prepare
- Select three projects.
- Collect and clean the materials.
- Remove labels and adhesive.
- Choose one colour palette.
- Check which tools and supplies are required.
Saturday: paint and cut
- Sand suitable wood and metal.
- Cut cardboard, paper and fabric pieces.
- Apply primer, paint or stain.
- Leave finishes to dry for the full recommended period.
Sunday: assemble and style
- Sew or glue the prepared parts.
- Add ribbon, twine or labels.
- Check every fixing and edge.
- Place the finished objects around the home.
- Remove anything that makes a display feel crowded.
Do not rush drying or curing to finish within a weekend. Some products require longer before the item can be safely handled or used.
How to keep upcycling from looking cheap
Prepare every surface properly
Labels, adhesive residue, rough edges and uneven paint immediately reveal a rushed project. Cleaning and preparation often take longer than decorating, but they create the greatest improvement.
Limit the number of materials
Twine, lace, ribbon, glitter, artificial leaves and lettering do not all need to appear on one item. Choose one or two finishing details.
Repeat colours across projects
Using the same rust paint on tins and cardboard leaves helps separate items feel like a designed collection.
Choose simple shapes
Clean leaf silhouettes, narrow stripes and plain lettering are easier to execute neatly than complicated motifs.
Know when to leave material visible
Clear glass, kraft paper, timber grain and woven fabric already have useful texture. Covering every surface can reduce their character.
Edit after styling
Once the display is assembled, remove the weakest object. Upcycled décor appears more confident when each piece has space.
Materials that should not be upcycled for décor
Not every discarded object is safe or suitable for a home project. Avoid:
- Cracked, chipped or heat-damaged glass
- Rusted tins or containers with sharp edges that cannot be made safe
- Containers that held hazardous substances
- Mouldy, damp or pest-damaged natural materials
- Unknown reclaimed wood with suspicious paint or chemical treatment
- Electrical items with damaged cables or missing safety information
- Structural pieces that are cracked, rotten or unstable
- Food packaging that cannot be cleaned adequately
Upcycling should extend the useful life of a safe material, not disguise damage.
Storing your decorations after autumn
Clean and dry every reusable item before storage. Remove batteries from lights when recommended, and check that paint and adhesive are fully cured.
Store paper and fabric decorations in a dry box away from pests and moisture. Wrap glass bottles and jars individually. Do not crush textile pumpkins beneath heavier objects.
Label the container clearly and make a short note of anything that needs repair before the next season. Thoughtful storage is what turns a one-year craft into genuinely reusable décor.
Final thoughts
The best upcycled autumn decorations begin with materials that are already useful: good glass, sound fabric, strong cardboard and clean wood. Careful preparation, a restrained palette and neat finishing can transform those everyday items without hiding their original character.
You do not need to complete all 15 projects. Choose two or three that solve a decorating need in your home. A cushion cover may add colour to the sofa, bottle vases can bring height to a console, and a frame tray can organise smaller seasonal details.
Keep safety and practicality central to every project. Use flameless lighting, protect against sharp edges, follow product instructions and keep combustible materials away from heat. A decoration is successful when it looks good, works in the room and can be brought out again next autumn.
For more colour palettes and room-by-room seasonal inspiration, explore The Complete Autumn Home Décor Guide.
Frequently asked questions
What are upcycled autumn decorations?
They are seasonal decorations made by giving an existing item or discarded material a new decorative purpose. Examples include turning jars into flameless lanterns, shirts into cushion covers and packaging cardboard into leaf garlands. The material should be safe, clean and suitable for the intended use.
What household items can I use for autumn crafts?
Clean jars, glass bottles, food tins, cardboard packaging, old shirts, damaged jumpers, picture frames, curtain rings and paper shopping bags can all be useful. Inspect each item carefully and discard anything cracked, contaminated, mouldy, rusty or structurally unsafe.
How can I make DIY autumn décor look expensive?
Choose a limited palette, prepare surfaces properly and use fewer decorative details. Repeat the same colours and finishes across multiple projects, keep lettering simple and group finished objects with everyday ceramics, books or lamps. Neat edges and controlled styling matter more than expensive supplies.
What colours work best for upcycled autumn decorations?
Rust, olive green, cream, mustard, burgundy, brown and warm grey work well together. Choose one neutral, one main autumn colour and one darker accent. Use the same palette across jars, textiles and paper crafts to create consistency.
Can children help make these decorations?
Children may be able to help with age-appropriate painting, paper arranging or choosing colours under close supervision. Adults should handle craft knives, hot glue, drills, sharp scissors, metal edges and chemical products. Check product age guidance and keep small components away from young children.
Can I use real candles in upcycled jar lanterns?
Battery-operated lights are the safer option. Paper, fabric, twine, adhesive and many paints are combustible or unsuitable for heat. An ordinary jar decorated for crafts should not be assumed safe for an open flame.
How can I use natural leaves in autumn decorations?
Collect only where it is permitted, choose clean undamaged leaves and dry them fully before indoor use. Avoid rare or protected plants and do not strip living branches. Keep dried material away from flames, heaters and damp areas.
Can upcycled autumn décor be used outside?
Only when every material, adhesive, paint and fixing is suitable for exterior conditions. Cardboard, paper, ordinary fabric and most indoor finishes will deteriorate in damp weather. Use them inside or in a genuinely dry covered space.
How do I remove labels from jars and bottles?
Soak containers in warm soapy water when suitable, peel away the label and use a cleaning method compatible with the surface for remaining adhesive. Wash and dry the container thoroughly. Never mix cleaning chemicals, and follow product instructions.
How should I store homemade autumn decorations?
Clean and dry them first. Store paper and textiles in a dry lidded box, wrap glass individually and remove batteries where recommended. Keep delicate crafts away from heavy items and label the box so it can be found easily next autumn.